Showing posts with label flour. Show all posts

Friday, January 25, 2013

Multi-Grain Batter Bread

I love bread.  For real.  It's fun to make, and kneading bread sometimes keeps me from killing people!  (Kidding.  Mostly.)  It smells good and there is nothing quite as good to eat as fresh bread with butter.

This is a great bread since there's only an hour between that time you're thinking, I could eat some bread, and that time when you pull the bread out of the oven.

Bread in one hour!


Multi-Grain Batter Bread
adapted from Betty Crocker

cornmeal for dusting
4 1/2 to 5 c. all-purpose or bread flour
2 tbsp sugar
1 tsp salt
1/4 tsp baking soda
1 1/2 tbsp yeast
2 c milk
1/2 c water
1/2 c whole wheat graham flour (or regular whole wheat flour)
1/2 c wheat germ
1/2 c regular rolled oats (or quick oats)

Grease and dust 2 cookie sheets w cornmeal.  Preheat oven to 400.

Mix 3 1/2 c. all-purpose flour, sugar, salt, soda, and yeast in a bowl.  On the stove, heat the milk and water until it is very warm.  Do not boil!  If it gets too hot, it will kill your yeast.  Add the milk mixture to the dry mixture.  Beat on low until everything is moistened.  Beat on medium speed for about 3 minutes, stopping to scrape the bowl now and again.  Stir in the wheat flour, wheat germ, oats, and remaining all-purpose flour to make a stiff batter.  (You're not making a stiff dough, which would be very dry, but you want it to still be a batter.)  Divide the dough between the two pans.  Grease and flour your hands, and then shape them into a ball.  Sprinkle a little more cornmeal on top.

Cover and let them rise for a half hour.  Bake for 25 minutes.

Tuesday, November 22, 2011

Chocolate Chip Pumpkin Cookies

I own very few cookbooks.  I mean, for someone obsessed with cooking, anyway.  Less than 10, I think.  Instead, I keep a giant binder full of recipes.  This is one of them.  I have no idea where the original came from. But I am oh-so-glad I have it.


Chocolate Chip Pumpkin Cookies

4 c. flour
2 c. sugar
3 tsp. cinnamon
2 tsp. baking soda
1 tsp. salt
1 can (16 oz) pumpkin puree (NOT pumpkin pie filling)
1/2 c. melted butter
1/2 c. vegetable oil
2 eggs
2 tbsp. milk
2 tsp. vanilla
2 c. chocolate chips (I used combination of chocolate chips and a giant semi-sweet chocolate baking bar)
1/2 c. chopped nuts (I used pecan chips)

Combine dry ingredients in mixing bowl.  Combine pumpkin, butter, oil, eggs, milk, and vanilla in another bowl.  Pour the wet ingredients into the dry ingredients and mix well.  Stir in chocolate and nuts.

Drop dough by tablespoonful onto cookie sheet.  Space about 2 inches apart.


Bake at 375 degrees for 13-14 minutes.  Let cool a couple minutes on pan, then move to rack to finish cooling.

Thursday, April 14, 2011

Potato Chip Cookies


I know, weird, right?  That's what I thought, too.  I like cookies.  I like chips.  Why not give it a try?  These cookies are super buttery; they remind me of shortbread.  And that, my friends, is a good thing.


Potato Chip Cookies
from The Spiced Life

1 c. unsalted butter, softened
1/2 c. sugar
1 tsp. vanilla
1/4 tsp. coarse salt (optional--depends how salty your chips are.  I left this out, but probably would add it next time, if using the same chips.)
2 c. flour
2 c. coarsely crushed potato chips, divided
coarse salt and sugar for sprinkling

Preheat oven to 325.  Line your cookie sheet with parchment or wax paper.

Beat butter and sugar until fluffy.  (Add salt if using.)  Mix in vanilla, then flour and 1 c. potato chips.  Mix well to incorporate chips, but don't overmix.

Using cookie scoop or spoons, shape dough into 1" balls and roll in remaining crushed chips.  Put on the cookie sheet 2" apart, and flatten slightly.  Sprinkle salt or sugar over the top (both are good, but I preferred those with salt on top).  I fit 12 cookies on my first sheet and 10 on the second.

Bake for 12-15 minutes at 325.  These cookies don't really brown.  Let cool 5 minutes on the cookie sheet, then transfer to a rack to cool completely.

Lemon Bread

I love a quick bread.  You know, they're quick.  They're bread.  What's not to love?  This is easily my favorite for a couple reasons:  it's easy and it makes everyone happy.  Lemons are like some kind of cheap Zoloft.  Everyone loves something lemony.  It's a fact.

Lemon Bread
from Better Homes & Gardens New Cookbook

1 3/4 c. flour
3/4 c. sugar
2 tsp. baking powder
1/4 tsp. salt
1 beaten egg
1 c. milk
1/4 c. oil or melted butter (you know I used butter; it's worth it)
2 tsp. finely shredded lemon peel
1 tbsp. lemon juice
2 tbsp. lemon juice (for topping)
1 tbsp. sugar (for topping)

You only need one lemon for this recipe, FYI.

Grease the bottom and 1/2 inch up the sides of a loaf pan.  Mine was a 9" one; an 8" probably would've looked nicer, but it was fine.

Combine flour, sugar, powder and salt in a medium bowl; make a well in the center and set aside.  Combine your beaten egg, milk, butter, lemon peel, and lemon juice.  Your microplane grater is perfect for zesting the lemon.  Don't buy the stuff in a jar.  For the same price, you can buy a microplane.  Just don't zest the pith (the white part).  Pour the wet ingredients into the dry ingredients and stir until just combined (a little lumpy).  Pour into your loaf pan.

Bake at 350 degrees for 50-55 minutes until a toothpick inserted in the middle comes out clean.  Set pan on a rack to start cooling.  Meanwhile, combine the 1 tbsp. sugar and 2 tbsp. lemon juice in a bowl.  Spoon or brush this over the top of the warm bread.  Trust me.  You want to do this.  Let the bread cool about 10-15 minutes in the pan, the remove it to finish cooling on the rack.  This is best if you can wrap it and eat it the second day, but really, a few hours wrapped up is fine, too.

New to zesting a lemon?  Here's a handy video.

Friday, March 25, 2011

Lazy Cream Bundt Cake

Generally, cake isn't exciting.  Frosting, yes.  Cake, no.  You know why I think that?  Because most of the cake I've had in my life has come from a box.  I totally think that cake mixes have their place.  There is something comforting about their odd lightness and fluffiness.  But, generally, for me, that's not really what I want from a cake.  I want something a little denser, and definitely more interesting.  That's my personal preference.


This is an extremely easy cake to make, especially if you are first-timer and a little nervous.  The main trick with this one is just to be sure to grease and flour the pan really well, or it'll stick.  Plus, someone you know has a Bundt pan you can borrow, and so you don't have to buy your own.

Lazy Cream Bundt Cake
from The Spiced Life

3 c. flour
1 tbsp. baking powder
1/2 tsp. salt
6 large eggs, room temperature (just set them out at the beginning of prep time and they'll be fine by the time you need them)
2 3/4 c. sugar
4 tbsp. vanilla or 1 tbsp. vanilla plus 1 tsp. lemon or orange zest (I totally forgot about the vanilla.  So my cake just tastes like cream.  I'm not really complaining.)
2 c. heavy cream (the package might say "whipping cream"), room temperature (again, just let it sit on the counter a bit)

Preheat oven to 350 degrees.  Grease and flour a 12-cup Bundt pan.

Mix the flour, salt and baking powder together in a bowl and set aside.

Beat the eggs and sugar together in a mixer on medium speed for about 5 minutes or so.  The batter will start to thicken up a little and turn a lovely pale yellow color.  While mixing, slowly pour in 1/3 of the cream, followed by 1/3 of the flour mixture, stopping to scrape the sides of the bowl after the flour addition.  Do that two more times and then beat the whole thing for a minute on medium to combine well.

You can't really tell, but I promise this is yellow.


Scrape the batter into the pan.  Bake one hour, checking at 45 minutes to see if it's getting too brown.  If so, tent some foil over the top.  Mine was fine, so I just baked it the whole hour with no foil.

Ready to go in the oven.


When the cake is done, it'll start to pull away a little from the sides of the pan.  It'll be puffy and beautiful (it will deflate some after you take it out).

It's done!  You can see how much it rose and how it's pulling away from the sides.


Let it cool for 15 minutes on a wire rack, then invert it onto the rack and slowly (and wiggly) remove the pan.  Let it cool completely.  Then eat it!

Don't tell the raw egg police, but we actually argued over
who got to lick the bowl.  Super tasty.

I'm linking up with Sweets for Saturday here.  Check it out for more tasty treats.

Wednesday, March 16, 2011

Pancakes

I love pancakes.  I didn't use to.  I merely tolerated them.  But all of the sudden, they are like manna and I am filled with great joy at the sight of them.  They are just what I want!

You could make pancake-like substances from that weird mix where you just add water and shake.  Or from that other weird mix where you open a box and add an egg or something (I forget).  Those aren't as tasty as the real thing.  And the real thing is actually easy to make.

This recipe reflects the fact that I have 4 pancake-loving children and a husband who also likes pancakes.  You may want to halve it if you are humans.  Then again, I should note that pancakes keep nicely in the fridge or freezer.  I always make extras so we can just microwave them the following day.  Bam.  Pancakes.


Pancakes
adapted from Betty Crocker's New Cookbook

4 large eggs
4 c. flour (I used white with the bran added back in, but wheat is fine, too)
3 c. milk (more for thinner pancakes)
3 tbsp. sugar
3/4 stick of butter, melted (if you use the whole thing, I won't tell)
3 tbsp. baking powder
1/2 tsp. salt

Beat eggs in large bowl with whisk, hand beater, fork, or sheer will.  Mix in remaining ingredients just until smooth.  Let it rest while you heat up your electric griddle (375 degrees) or frying pan.  You can grease your pan if you have to, but I don't.  If you can drop a few drops of water on the pan and it dances, then your pan is hot enough.  I use a 1/2 c. ladle (or just use your 1/2 c. measure) to scoop the batter onto the pan.  Let them cook until the edges start to look a little dried out.  Flip and cook the other side (it won't take as long).

You can keep them on a plate in a warm oven if you want to serve everyone at once.

You can adjust what you put in these little gems.  When you pour the batter out, you can sprinkle with frozen or fresh blueberries, chocolate chips, crumbled bacon, perhaps?  I am doing the bacon thing next time.  I've been dreaming about it for long enough.

I think it's pretty common practice that the pancake chef often jacks up the first pancake (too dark, too doughy in the middle, maybe both).  So don't be sad if it happens to you.  I have only recently gotten to where the first one is consistently good, and I have been making them since 1995, when my lovely friend Brenda taught me the ways of pancake-making.


What, you want a picture?  We ate the picture.

Friday, December 24, 2010

Chocolate Chip Cookies

I bake two different cookies that make people swoon: ginger cookies and chocolate chip cookies.  I didn't even make up this recipe for chocolate chips cookies, but everyone I know that tries them LOVES them.  I think it's because there isn't any vanilla in them, which frees you up to really taste the delicious combination of chocolate, butter and salt.

Try not to eat all the raw cookie dough.


Thanks again to one of my two favorite cookbooks, Betty Crocker's New Cookbook (the other being Better Homes and Gardens New Cook Book, 15th Edition (Better Homes & Gardens Plaid)), for the making and baking of basic foods.  If you are new to, or afraid of, cooking, I highly recommend either of these books.  They are like the blankie of cookery.

Many cookies were harmed during the photography process.
I had to eat this one.


Chocolate Chip Cookies
from Betty Crocker's New Cookbook

3/4 c. sugar
3/4 c. packed brown sugar
1 c. butter, softened
1 egg
2 1/2 c. flour
1 tsp. baking soda
1/2 tsp. salt
1 package (12 oz) chocolate chips (I used Ghirardelli Bittersweet)

Mix sugars, butter and egg.  Stir in flour, soda and salt.  The dough will be stiff.  Stir in chocolate chips.  Drop by rounded teaspoons (I use a cookie scoop) about 2 inches apart on ungreased cookie sheet.  Bake 8-10 minutes at 375 until light brown.  Cool slightly and remove to wire rack to cool completely.


Do me, and everyone you love, a huge favor and DO NOT USE MARGARINE.  I am begging you.  And, I think today is the day you should splurge for a better quality chocolate, while you're at it.  You will taste the difference.

Thursday, December 16, 2010

Ginger cookies

This is my favorite Christmas cookie, for a couple reasons.  I only make them at Christmas.  I only make one batch.  And if Christmas had a taste (besides pine, I guess), then this would be it.

I find that this recipe is just perfect.  I might add a little more cloves than they call for, but that's because I am all about the cloves.  They are definitely ginger-y and molasses-y.  And yumm-y.


Giant Ginger Cookies
from Better Homes & Gardens New Cookbook

4 1/2 c. all-purpose flour
4 tsp. ground ginger
2 tsp. baking soda
1 1/2 tsp. ground cinnamon
1 tsp. ground cloves
1/4 tsp. salt
1 1/2 c. shortening (I know, I know, it's not butter.  Shhh.)
2 c. sugar
2 eggs
1/2 c. molasses
sugar to roll the cookies in (1/2-3/4 c.)

In bowl, combine flour, ginger, soda, cinnamon, cloves and salt.  Set aside.  In mixer, beat shortening for 30 second.  Add 2 c. sugar; beat until combined.  Beat in eggs and molasses until combined.  Beat in flour mixture.  Shape dough into 2 inch balls (they are called "giant" cookies, after all!) and roll in sugar.  Place 2-2 1/2 inches apart on ungreased cookie sheet.  Bake at 350 for 11-13 minutes or until bottoms are lightly browned and tops are puffed.  They will look undone, but they are done.  Don't overbake them!  Cool on cookie sheet 2 minutes, then transfer to rack to cool completely.  Log onto this blog and thank me.


UPDATE
I've tried these with butter instead of shortening.  Yes, switch to butter, because they are FABULOUS with the butter.

Monday, October 18, 2010

Breakfast of Champions, Ya'll

Best picture I could get.  I'm a horrible photographer.

I was refilling my flour container and my sorghum jar was suddenly right in front of my face.  I love sorghum.

Are you wondering what I'm talking about?  I don't really ever see it around here, as I live in yankee territory. I think it's more of a southern food.  Sorghum is a tasty syrup that's similar to molasses.  Here's the wikipedia article.  My jar came from Missouri, but was made in Iowa.

I haven't tried subbing regular blackstrap molasses for the sorghum in this recipe, but feel free to try it.  Maybe maple syrup would work, too.  If you can get sorghum, this is a good recipe.  Would I lie to you?

Carrot Muffins
adapted from Maasdam Sorghum Mills recipe

1 1/2 c. flour
1/4 c. packed brown sugar
1 tsp. baking powder
1 tsp. baking soda
1 tsp. cinnamon
1/4 tsp. salt
1/2 c. shredded carrots
2 eggs, beaten
1/2 c. plus 2 tbsp. sorghum, separated
1/3 c. melted butter

Preheat oven to 350.  In bowl, sift together dry ingredients.  Stir in carrots.  In separate bowl, combine beaten eggs, 1/2 c. sorghum, and butter.  Stir wet mixture into dry ingredients just until combined.  Don't over mix!  Grease muffin tin and fill 3/4 full.  Drizzle remaining 2 tbsp. sorghum over tops.  Bake 18-20 minutes.  Cool 5 minutes, then pop out of pan.

The Flour Children LOVED these.  So did their mom.  Hub is still at work, so his are set aside.  Though Funny keeps threatening to eat them.

Monday, October 4, 2010

Beets can't be beat!

Okay, maybe beets can be beat.  I don't know.  Some people just really hate beets.  Which is sad.  Me, I'm actually not a lover nor a hater of the beet.  I'm open to beets.  Though, I fully admit that I ate way too many pickled beets as a child, and I no longer like those.

I saw this recipe in a Taste of Home magazine at a friend's house.  I've been collecting beet recipes to go with my collection of beets I've acquired through my CSA.  I already make bread, and it looked pretty simple, just with beets added.  Easy, peasy.


I employed the girls to help me make this.  They LOVE to make bread and I love that they help.  I definitely want them to be comfortable making homemade bread when they leave to start their own homes.  In fact, Funny said, "Mommy, I need to get good at this so I can teach my own kids."  This is something I just adore about cooking, how it's been passed down.  I know my grandma taught my mom to cook, and she taught me and my sister, and now I am teaching my kids.  I find great pleasure in knowing I am connected to my family through cooking.


Honey Beet Bread
adapted from Taste of Home

1 tbsp. regular or quick rise yeast (I used regular)
1 1/2 c. warm water (110-115 degrees)
2 tbsp. honey
1 1/2 c. peeled, grated fresh beets, squeezed dry (really squeeze them!)
1 c. warm milk (110-115 degrees)
2 tbsp. butter, softened
2 1/2 tsp. salt
6 1/2 - 7 c. all-purpose flour
1 egg white or a bit of milk, for brushing on the top
toasted sesame seeds (dry toast them quickly on the stove top)

In large bowl, dissolve yeast in water.  Add honey and let rest for 5 minutes.  Add beets (seriously, squeeze them dry), milk, butter, salt and 3 cups flour.  Beat until smooth.  Stir in enough remaining flour to form soft dough.  Knead by hand or by machine with dough hook for 6-8 minutes until smooth and elastic.  Place in greased bowl and flip to grease both sides.  Cover and let rise in a warm spot until doubled, about 50 minutes.

Punch down dough.  Turn onto lightly floured surface and divide dough in half.  Shape into two loaves.  Place in two greased 9x5x3 loaf pans.  Cover and let rise until doubled, about 40 minutes.

Brush with egg whites or milk.  Sprinkle with seeds.  Bake at 350 for 30-35 minutes or until top begins to brown.  Remove from pans to cool.
Inside of the bread.  From my busted up loaf.  Pretty!!

Notes:
I immediately popped loaf #1 from the pan, and it stuck.  I let loaf #2 rest (like a quick bread) for about 5 minutes, then removed it with no problems.  I also forgot about the egg wash and so used milk during the last 5 minutes to just help with browning, and tossed the toasted seeds on top then, as well.
Also, the dough wasn't as dry as I am used to.  It was firmer than a quick bread, but not quite like a regular loaf of bread.  I suspect if I had squeezed the beets a second time, it may have helped with that.  But I did increase the flour as a result, and this recipe reflects that.  You may want to start with a quarter cup less.

I will make this again!

Tuesday, September 14, 2010

I'm Ruined

I was reading Heirloom Baking with the Brass Sisters, which is a dangerous book.

There's a recipe in here for Mayonnaise Biscuits.  I thought, that's weird.

Then today I was on AllRecipes, and then there they were again.

Clearly, God wanted me to make these biscuits.  I'm almost sorry I did.  Because they are THAT good.  And worse...easy.

I'm so sorry.


Mayo Biscuits

2 c. self-rising flour (I made my own:  1 c. all-purpose flour, 1 1/2 tsp. baking powder, and 1/2 tsp. salt)
1 c. milk
6 tbsp. mayo

Mix all together.  Seriously.  That's how easy they are.  These are drop biscuits, so you just drop them onto a lightly greased cookie sheet like you were making cookies.  Only maybe a little bigger than a cookie.  Bake at 400 degrees for 12 minutes.  Done.


I tasted one when they came out of the oven.  This is a light biscuit.  You will not be making egg sandwiches with these.  It was so good, I whipped up another batch right then and there.  Dangerous.

Friday, June 4, 2010

Ah, rhubarb


Hello, rhubarb! I want to eat you.


I got my first CSA delivery today. I am so excited. Amongst the many greens that are ready at this time of year, I found some rhubarb. Oh joy! I looked at rhubarb at my local grocery store earlier in the spring. But the price horrified me. I am always willing to pay more for good quality food, but I was pretty sure that it had been trucked in from who-knows-where, and wasn't very good. So I held out. And I'm glad I did.


As soon as I got home, I started rooting around for what I would do with my excess of strawberries (we picked them on Wednesday, and they came in the CSA) and that tasty, tasty rhubarb. Here's what I came up with:


I based this on a Country magazine recipe for a strawberry-rhubarb pie with crumb topping.


Strawberry-Rhubarb Crisp

Gather:
stick of butter
flour
oats
rhubarb
strawberries
sugar
brown sugar
1 egg
vanilla

Butter a 13x9 pan/dish.

Filling:
Chop 3-4 stalks of rhubarb into 1/2" pieces (about 3 cups or so, based on your tastes). Cut strawberries in half, maybe about 4-5 cups. The thing about rhubarb and strawberries is they will both cook down. So err on the side of excess. Make as much filling as your family will eat! Set fruit aside.

In a bowl, mix together about 1 c. white sugar, 3 tbsp. flour, 1 tsp. vanilla and 1 egg. Then gently mix in the fruit.


This is the filling. If you need to make more to fill your pan, it's easy enough. I added a bit more sugar, another stalk of rhubarb, and another cup of strawberries to fill my dish up to where I wanted it. Pour the filling into the buttered dish.


Topping:
1/2 c. brown sugar
stick butter
1/2 c. oats
1 c. flour

Combine the dry ingredients. Cut in the butter with pastry blender. I always end up using the pastry blender at the beginning, but end up using my hands to break up the bits of butter.


Sprinkle the topping over the filling.

Bake at 350 for 40-45 minutes.

Funny enjoys her dessert.


A few notes:
I was out of brown sugar, so I just used white sugar and added a tbsp. or so of molasses. Yum.

If you are a rhubarb newbie, you should know that sugar is the key with rhubarb. It is super, super sour! Be generous with the sugar. It's okay this one time. Would I lie to you?

Tuesday, April 27, 2010

Good, and good for you!?


One of the best things about oatmeal cookies is that you can pretend that they're good for you! With all that oatmeal, it has to be healthy, right?

Yes. Let's go with that.


These are adapted from the Better Homes & Garden Cookbook.

Little cookie soldiers, all lined up.

Oatmeal Peanut Butter Chip Cookies

1 3/4 c. butter, softened to room temperature
1 c. brown sugar
1/2 c. white sugar
1 tsp. baking powder
1/4 tsp. baking soda
1 1/2 tsp. cinnamon
1/2 tsp. ground cloves
2 eggs
1 tsp. vanilla
1 3/4 c. flour
2 c. old fashioned oats
1/2 bag peanut butter chips (about 1 c. or so)

I used a teaspoon-sized cookie scoop for mine. Bake for about 8-10 minutes at 375. You need to remove them to a rack to cool within a couple minutes of them leaving the oven, as they will become one with the pan if you don't.

I suppose if you want, you can leave out the cinnamon and the ground cloves.

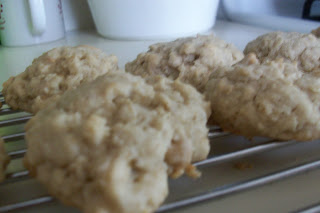
Here's the finished product, cooling on a rack. I really am trying to take better photos. It doesn't seem to be working.

Tuesday, February 23, 2010

Blondies


I posted on Facebook today that I was making blondies, and a lot of people had never heard of them. It turns out that blondies have a long history, and can trace their roots back to ancient times, when Romans, Greeks, and Egyptians made a dense honey cake that resembled today's blondie. Blondies are also known as butterscotch brownies.


Blondies with Chocolate Chips

2 c. packed brown sugar
2/3 c. butter
2 eggs
2 tsp. vanilla
2 c. flour
1 tsp. baking powder
1/4 tsp. baking soda
1 tsp. salt
1 c. chocolate chips

Grease a 13x9 glass dish or baking pan. In a medium pot, melt butter over medium heat with brown sugar, stirring constantly until the mixture is smooth. Cool slightly--a few minutes. Add eggs, one at a time. Stir in vanilla. Stir in flour, baking powder, baking soda, and salt. Quickly mix in chips, and spread into pan. Your mixture will look swirly and that is okay. They will be delicious. For a traditional blondie, leave out the chocolate. I think things are better with chocolate. That's just my opinion. Bake at 350 for 25-30 minutes. You can test it with a toothpick, but I think if the toothpick comes out totally clean, it means you over-baked them. Mine baked about 27 minutes, and they were perfect.

Thursday, February 18, 2010

Toffee Brownies


I'm crabby today. What solves crabby better than chocolate!? (That's rhetorical, people.)

Did I mention that I also feel lazy today? Sad, but true. Crabby and lazy often go together around here.


Toffee Brownies

1 box brownie mix, according to box directions
some chocolate-toffee chips

Viola! Nothing but the fanciest stuff around here today. I just mixed the box mix up according to the directions on the back of the box. I accidentally (or desperately?) bought a milk chocolate brownie mix last time I was at the store, since the real ones were sold out. Take my word for it, they are just wrong. I think I had 2 or 3 boxes, and this is the last one (thank goodness). Basically, this recipe is an attempt at making them edible for someone other than a 3 year old.

Where was I? Oh yes. Brownie mix. I just stirred in some Heath pieces that I had leftover from my intentions at Christmas. I didn't use the whole bag, because you never know when a toffee emergency will strike later on and I'll need to just eat them straight from the bag. Let's be honest here. We all do it.

Right. So, mix the pieces in, and bake according to the box. Mine are in a 13x9 glass dish, so they will bake maybe 25 minutes (at 350), tops. Do me, and everyone you love, a favor. Don't over bake your brownies.

Now, generally, I am opposed to frosted brownies. Not as much as I am opposed to the cake brownie, but that is another post for another time (probably never). But, since I am trying to figure out a way to make the milk chocolate brownies work, I whipped up a little powdered sugar frosting.


With thanks to Better Homes and Gardens:


Chocolate Powdered Sugar Frosting (or Icing, for those of you who care)

1 c. powdered sugar (the recipe says "sifted," I say "pfft")
1 tsp. vanilla
2 tbsp. cocoa (okay, I added more like 3 tbsp. I am having a bad day, remember?)

Mix those up. Then, with your beautiful and well-deserved KitchenAid stand mixer whirring, slowly add in

1-2 tbsp. milk (to desired consistency).

Start slowly with the milk, and add it a bit at a time. Mine is a bit runny today as I'm in a bit of a sloppy, drizzly mood.

Once your brownies come out of the oven, pour the icing over top.


Spread it around.


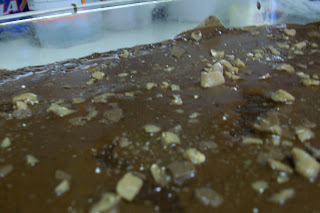
Okay, okay. You talked me into it. I sprinkled the top with a handful of toffee bits. So sue me.


These were SUPER good. Very rich, so only a little piece is necessary. I couldn't even tell there was a milk chocolate mix under there.

Chocolate DOES make me happy. A girl has to keep her voluptuous figure somehow.

Monday, February 8, 2010

Just grab 'em in the biscuit


Goofy even licks the crumbs off this face. He knows good stuff when he eats it.


Nothing says comfort to me more than some homemade bread. Especially biscuits. My grandma taught me how to make them. Grandma says, "you have to be gentle." And she is right! And, the butter has to be cold. That helps them flake. Here's a time when it's good to be flaky.

This is not my grandma's recipe. I have no idea what recipe she used. But a biscuit, I daresay, is more about technique than the recipe.

Today's version is from the Better Homes and Gardens New Cookbook (2002). I doubled this recipe and it turned out nicely.


Biscuits Supreme

3 c. flour
4 tsp. baking powder
1 tbsp. sugar
1 tsp. salt
3/4 tsp. cream of tartar
3/4 c. butter or 1/2 c. butter plus 1/4 c. shortening (I used 2 sticks, since I doubled it, and they were plenty buttery)
1 1/4 c. buttermilk or 1 c. milk (I used milk today)

Preheat oven to 450.


Mix together flour, baking powder, sugar, salt and cream of tartar. (I'm not sure why Silly looks so concerned. Who knows what goes on in her 3 year old brain.)


Cut in butter with a pastry blender, until the mixture resembles coarse crumbs. Add milk all at once.


Stir gently with a fork to combine. Turn out onto floured surface (I use my countertop) and knead just a turn or two. Like grandma says, "be gentle." Gently press down and out (don't use a rolling pin, please), about 3/4 inch thick.


Cut dough with a floured biscuit cutter.


Place biscuits 1 inch apart on an ungreased baking pan (or closer if you want them to bake together and have softer sides. Not that I've done it.). Bake 10 minutes until golden. Remove from baking sheet while still warm and serve. With some butter. Or jam. Or ham. Anything.

Cinnamon-y Deliciousness


Okay, so I am sort of obsessed with this blog, Oven Love. I just lurk all over it and dream about making these things. I finally broke down today and baked the Snickerdoodle Blondies. Why?

1. I had everything to make them. Nothing remotely exotic in them.
2. Blondie. Only thing I like better is a brownie. And anyone who knows me understands how much I love a brownie. But this is as close as it gets.
3. Snickerdoodle. Hello??? Best Christmas cookie ever. Well, maybe it's tied with the molasses cookie. But still. Tasty.

For you nutmeg haters out there (you know who you are), you can just leave it out. But you're crazy.

Snickerdoodle Blondies

2 2/3 c. flour
2 tsp. baking powder
1 tsp. cinnamon
1/4 tsp. nutmeg
1 tsp. salt
2 c. packed brown sugar
1 c. butter, softened
2 eggs, room temperature
1 tbsp. vanilla
2 tbsp. sugar
2 tsp. cinnamon
pinch nutmeg


Preheat oven to 350. Grease a 9x13 pan. I greased mine with the butter wrappers and used a glass Pyrex. Combine flour, baking powder, cinnamon, nutmeg, and salt.


In another bowl, cream butter and brown sugar for 3-5 minutes. I don't know why. I guess just make sure you are really combining it well. Add eggs, one at a time, then vanilla. Beat smooth. (Please ignore my counter behind the mixer. It happens.)

Stir in flour until well-combined. This batter gets very thick. Spread in pan. I had to use my hands to pat it down. Combine the sugar, cinnamon, and nutmeg in a small bowl and sprinkle over the batter.


Here it is ready to go in the oven.
Bake 25-30 minutes until the surface springs back when you touch it. Cool (if you can wait); cut.


These are super good. My kids begged for more. If you ask me, that makes it a winner.


See Oven Love's version here. She definitely takes better pictures than I do!